

 |
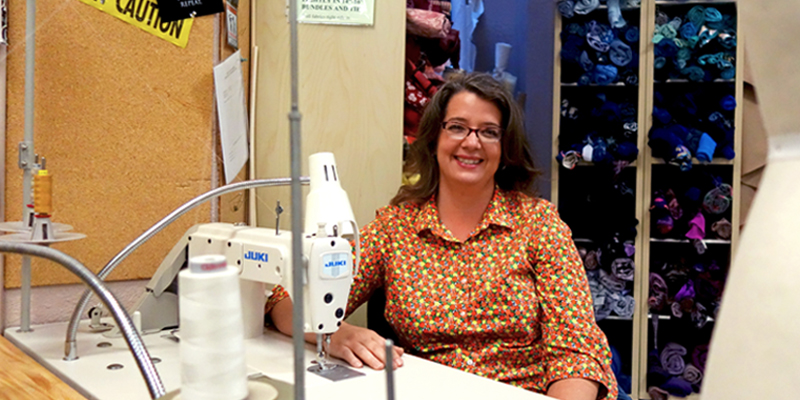
| South Coast Repertory's Cutter/Drapper, Catherine Esera |
 |
| Amadeus rendering by costume designer Alex Jaeger |
So, how does an illustration go from page to fully realized and functional costume on stage? Catherine J. Esera, South Coast Repertory's cutter/draper, is a part of the team that makes it all happen. Esera first joined SCR as an overhire for the Costume Shop in 2003. Eventually, she was hired full-time as the cutter/draper in 2009.
"When I explain to people about what I do, my first step is to correct them: I am not a costume designer," explains Esera. "Then I tell them that once the designer draws the costume renderings and selects the fabrics, I am given those, along with the actors' measurements, and am told, 'Make it happen!'"
 |
| Marco Barricelli with Camille Thornton-Alson in a different pannier. |
"In the Next Room, or the Vibrator Play was a huge costume show and my first big build on staff," says Esera. "Pride and Prejudice was fun to work on because of the huge fan base behind that title and because Paloma Young's designs were beautiful! Most of our Theatre for Young Audiences shows are a blast to work on. They're fast builds, but to pull off the fantastical with such unique materials is very challenging and fun."
For Amadeus, structure rules the designs, because many characters wear corsets, bum rolls and panniers. Esera was tasked with creating a pannier hoop skirt, which is a structure worn underneath women's skirts during late 18th century to create the overall shape and silhouette popular during that time. The pannier hoop is distinctive for its oval shape, rather than being formed in a circle.
Esera takes us inside her process with a step-by-step guide to building a pannier hoop.
 |
| Step 4 |
"It's important to use several different sources for period research. I use research as a guideline, rather than a law book. Since modern bodies are shaped differently than those of the past eras, putting all of the period seams in all the same spots just won't work. I also have to consider all the actor's physical needs, quick changes and maintenance for the performers' costumes. One of my sources was a book in our Costume Shop about Colonial Williamsburg clothing, which had photos and a pattern for a pannier hoop skirt. I read the description many times and scrutinized each photo. Then, I looked in other books and online for more photos and paintings of the same type of structure."
Step 2
"I scaled up the pattern from the book. Then, I took the "original" pattern and made it the proper size for the actor. I also made a few changes so it would be more theatre friendly—alteration points, added length, etc. I can never make anything just the way the books show. There's always some hot-rodding to be done!"
 |
| Step 5 |
 |
| Step 7 |
 |
| Step 8 |
"I washed, dried and pressed the natural linen that was chosen for our piece. I cut out all but the yoke from the linen. Since the yoke had the most changes, I cut those pieces out of muslin to make it easier for any possible adjustments during the first fitting."
Step 4
"Then, I sewed the cut fabric together, including the padded side openings and the drawstring waist."
Step 5
"Amy Hutto, our Costume Shop manager, and I bought lengths of natural round reed at a local reed and cane store. To make the frame to shape, I traced out my shapes from the scaled/graded pattern onto a piece of plywood and hammered nails into the plywood at about 1" apart. There are four hoops in the skirt: one small, two medium and one large."
Step 6
"One at a time—because I've never done this before—I soaked each reed for a minimum of three hours using a rain gutter that I borrowed from our Scene Shop."
Step 7
"I removed the reeds from the water and slowly bent it around the frame of the nails. The top hoop was the most difficult because it was the smallest and had compound curves."
Step 8
"I let the reeds dry on the frame for several days each."
Step 9
 |
| Step 11 |
Step 10
"I threaded the reeds into the linen skirt to build the structure."
Step 11
"Finally, we fit the whole piece on the actor, made the necessary changes to the yoke, cut the modified yoke pieces out of the linen, sewed them onto the skirt and voila! Pannier hoop skirt complete with reed hoops!"
Learn more and get your tickets to Amadeus.
No comments:
Post a Comment